
Zoom New Feature Roundup

Wondering if you’re up to speed on all the latest Zoom features? Here’s our roundup of the best new features that have been added to Zoom since Spring 2020! If you need to, be sure to update your Zoom app to the most recent version before trying these out.
Customizing Video Order
Zoom has added even more ways to customize video order in-meeting! To start us off with customizing, you can drag and drop to change your video order when in Gallery View; see this in action below:
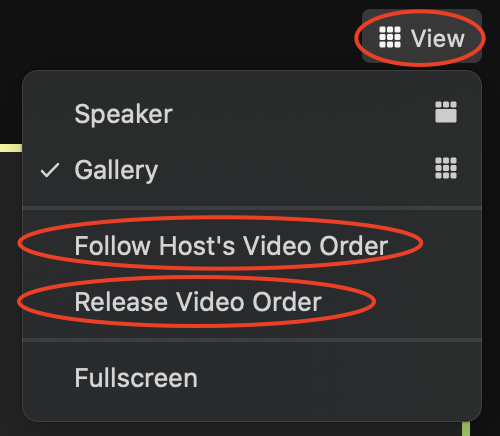
Your customized video order isn’t visible to your participants by default. You can, however, have your participants follow your video order by selecting View at top right, then Follow Host’s Video Order. Select Release Video Order to revert back to the default order:
Zoom now also allows you to pin multiple participants at once, meaning you can make multiple participants the primary speakers (reflected on your device only). Pinning multiple participants at once would come in handy whenever multiple students would need to be visible at one time when they speak, for instance when delivering a group presentation or other group assignment. To pin a participant, hover over their video and select the ellipsis in the upper right, then hit Pin:

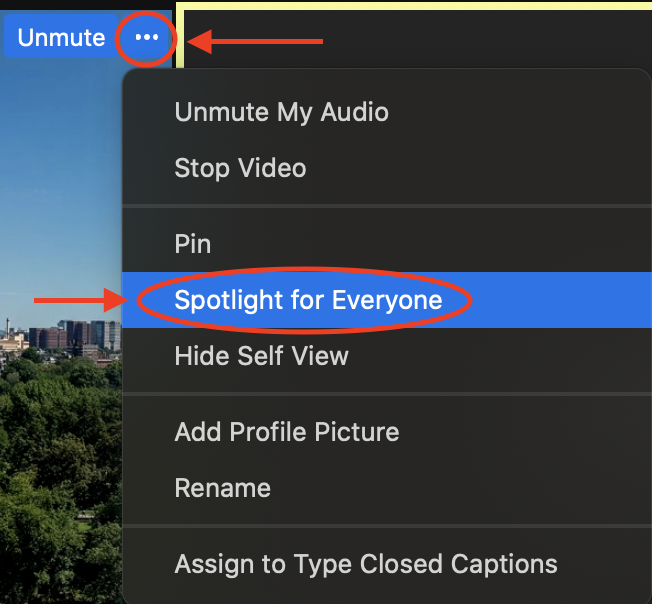
If you want to make multiple participants the primary speaker on your device and all other participants’ devices, you can instead spotlight those participants. To spotlight a participant, click the ellipsis button in the participant’s thumbnail and select Spotlight for Everyone:
Breakout Rooms
Are you a fan of breakout rooms? If so, check out the following new breakout rooms tips and tricks!
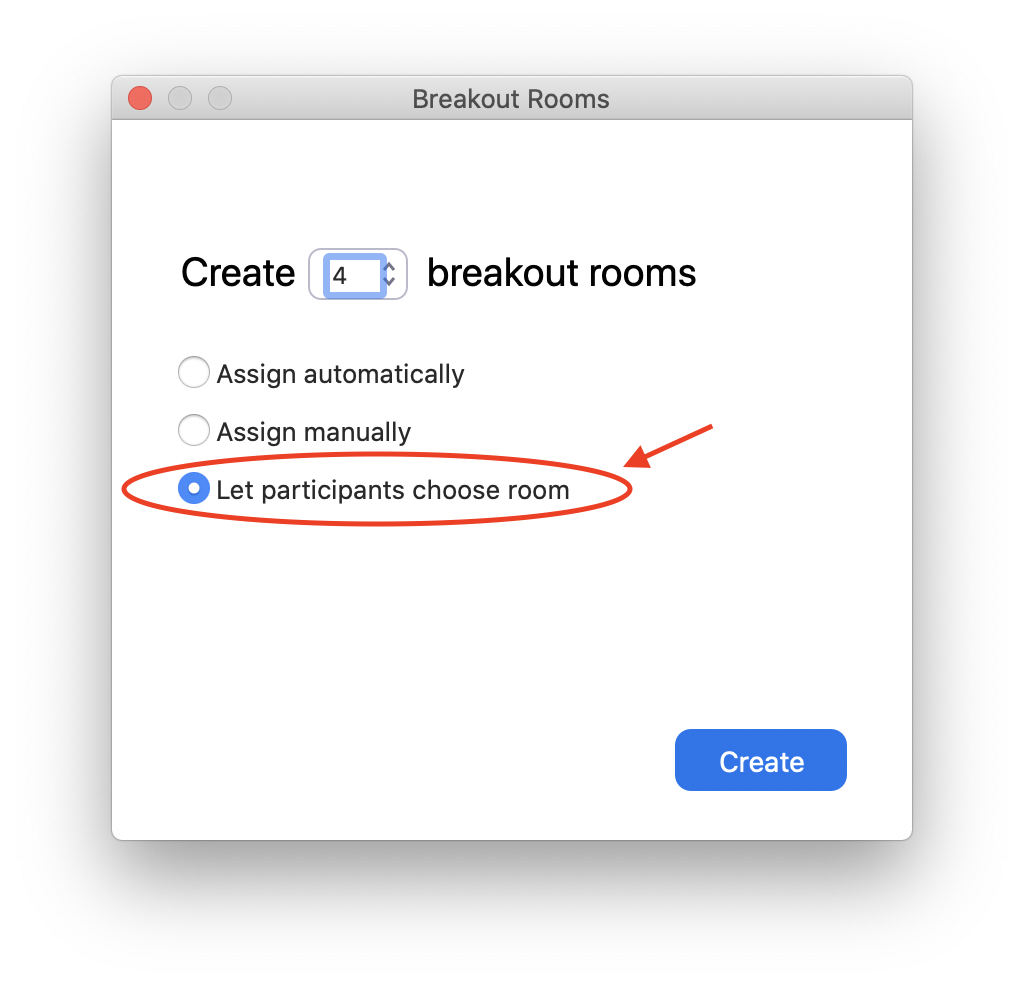
First, Zoom has added a self-select option for breakout rooms, which would allow students to select which breakout room they want to be a part of. To enable this option for your breakout rooms, when you are creating the rooms be sure to select Let participants choose room as the method of assigning participants to rooms:
Another helpful new feature in Zoom breakout rooms is related to the in-meeting chat. Previously, if you typed something into the chat while everyone was still in the main Zoom room (before opening breakout rooms), the chats would disappear once everyone was in the breakout room. Now, this functionality has changed so that what’s typed into the chat in the main room is still visible from within the breakout rooms. This change is super helpful because now, you can type the breakout rooms task instructions/discussion prompt into the chat and students will be able to easily refer back to your instructions even while they’re in breakout rooms.
The last new tip around breakout rooms is that co-hosts are now able to create breakout rooms! Before, co-hosts were only able to see all the rooms once opened by the host and move between them. With this change, the co-hosts and hosts of a meeting now have the same exact permissions with regards to breakout rooms.
Zoom in Canvas
Most faculty use Zoom in Canvas, so we’re happy to report that the Zoom-Canvas integration has seen a couple of improvements made to it since last year.
Reminder: Although there is a Zoom-Canvas integration which allows you to schedule and start meetings from within your Canvas course, the meetings take place on Zoom, not on Canvas.
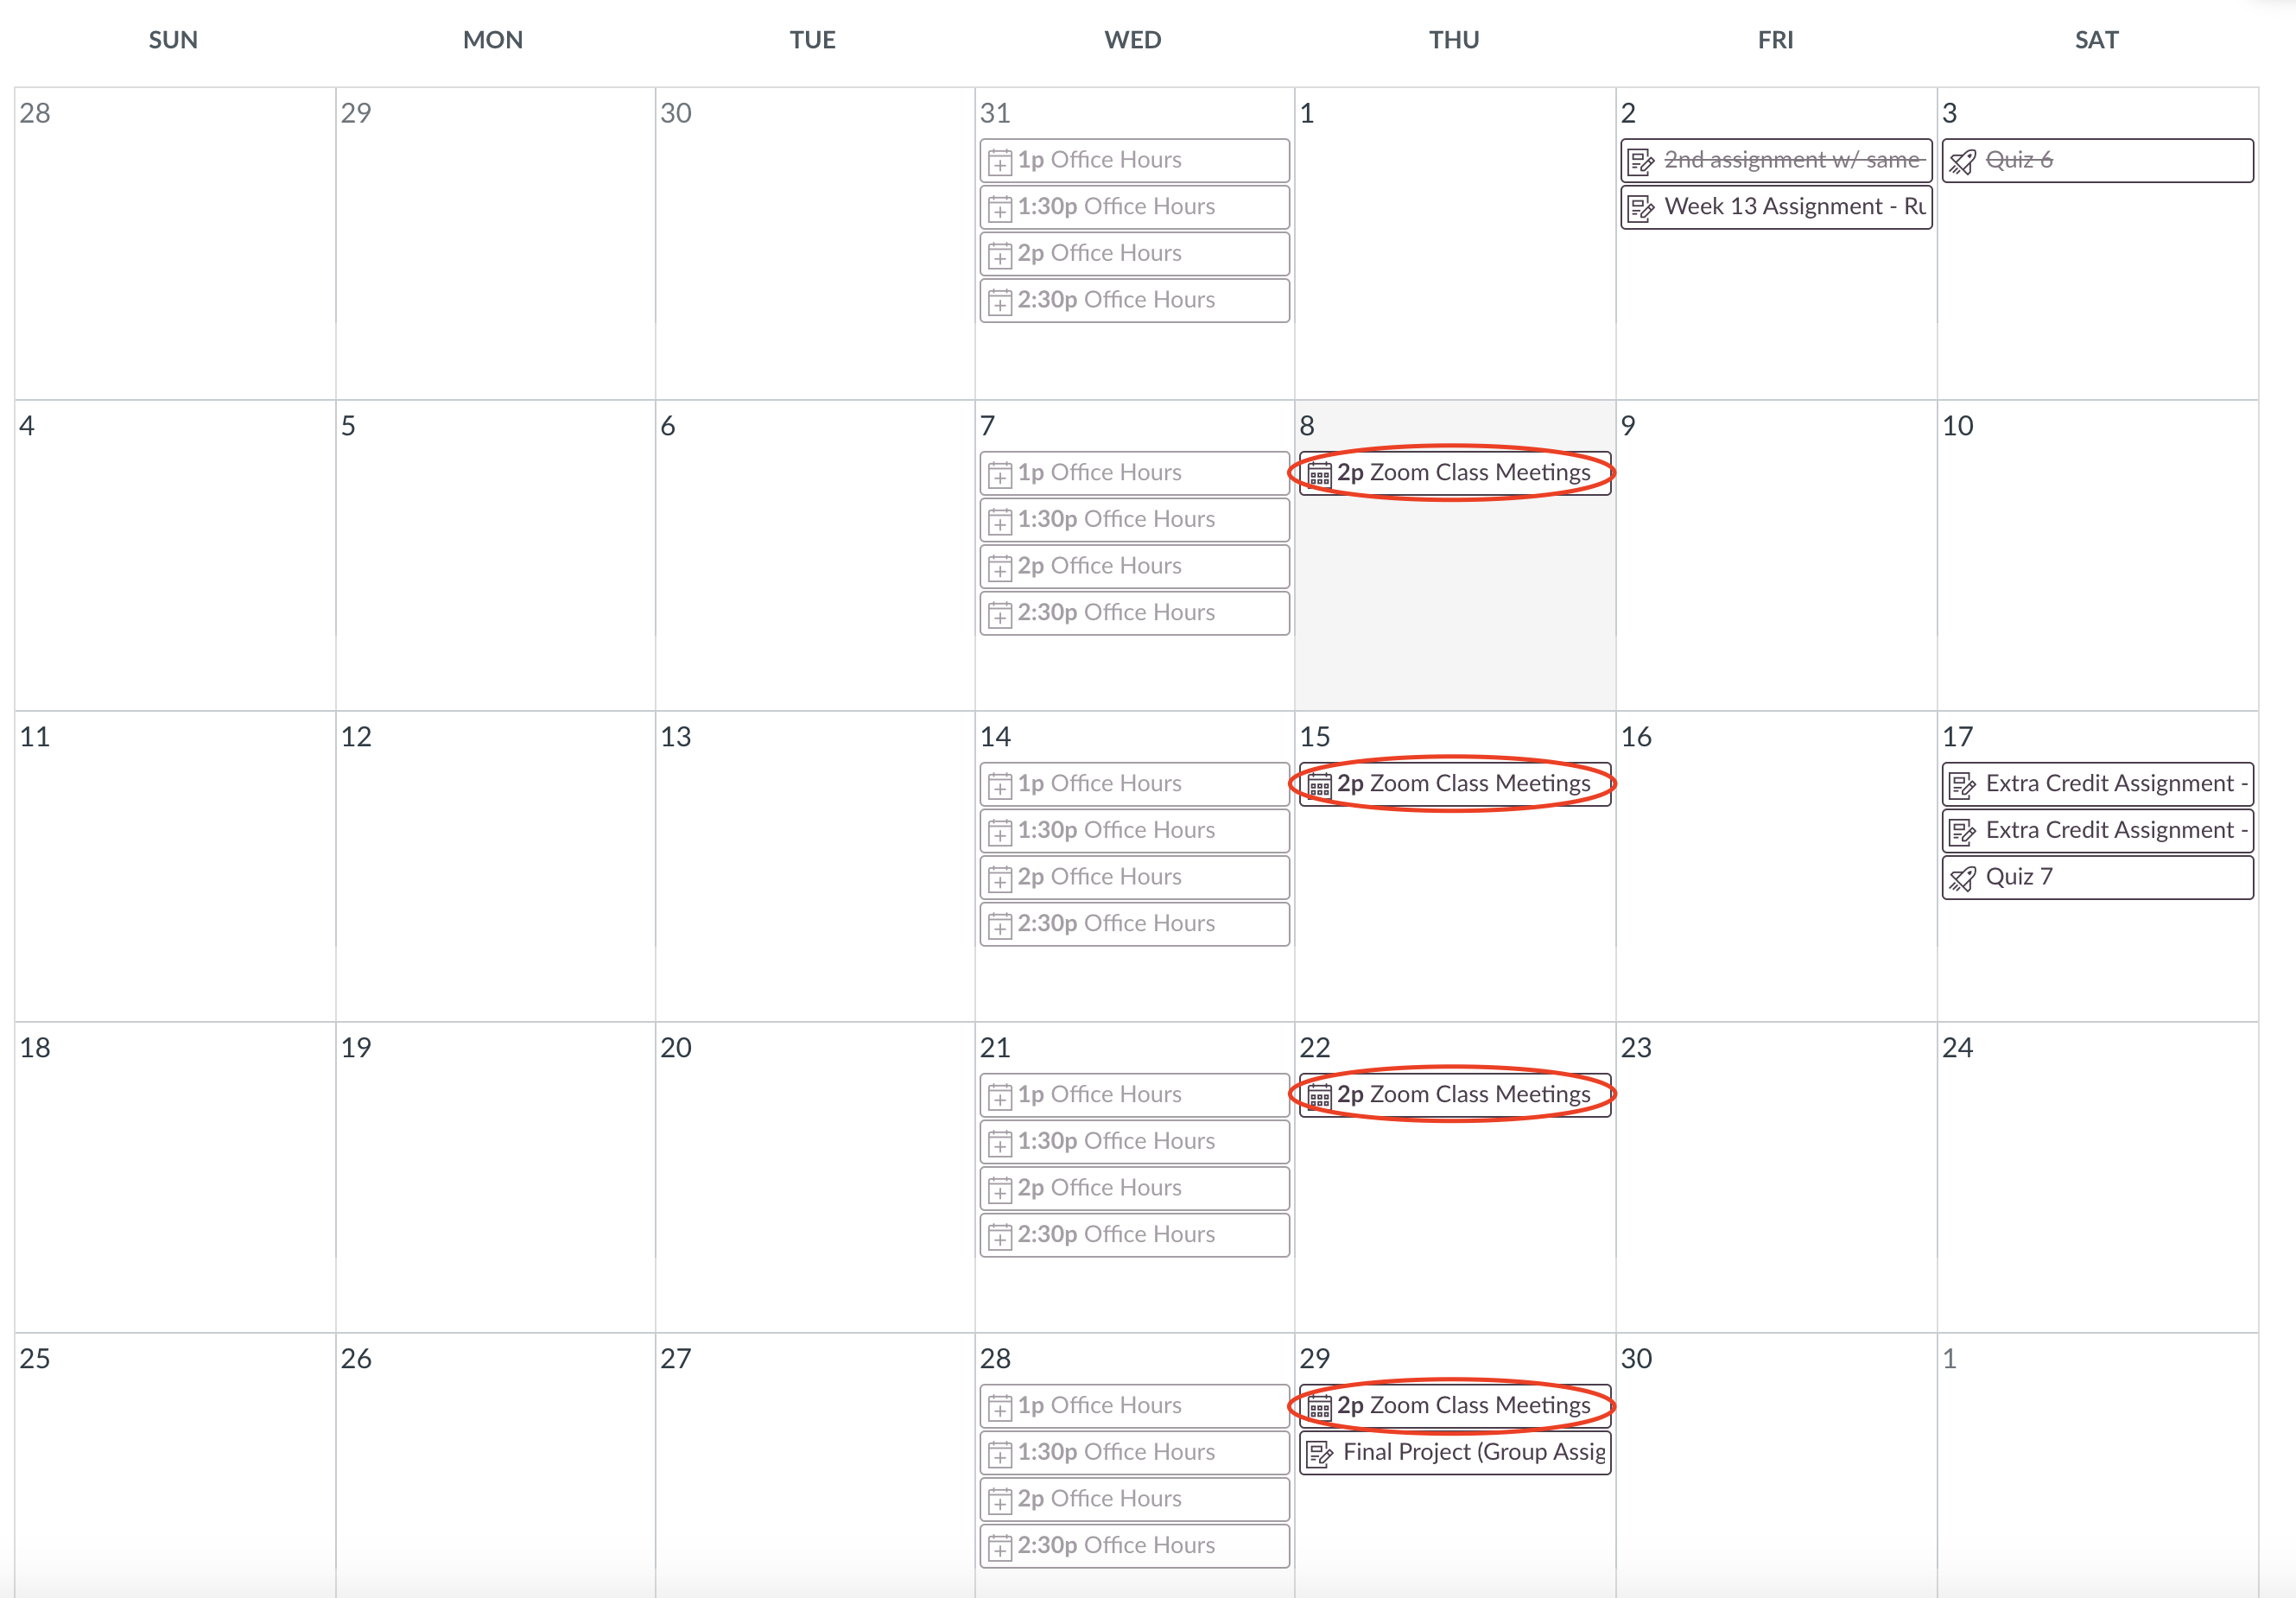
What’s new is that when you schedule your class’s Zoom meetings from within the Zoom tab of your Canvas course, the Zoom meeting is added as an event to the Canvas Calendar for your course:
Your Zoom meetings will also be added to the Course Summary of your syllabus page, if you have the Course Summary enabled there.
Another new functionality is that when you schedule a new meeting via Zoom in Canvas, a meeting invite will be automatically generated and sent to all students in the course via the Canvas Inbox. The invite will include the date and time of the meeting (or meetings if you created a recurring meeting), the topic (title) of the meeting, and the join URL.
Reminder: Notifications, including notifications for Canvas Inbox messages, will not be sent to students until one week before the first day of classes in Boston. Additionally, your course must be published in order for students to receive any notifications for your course.
Accessibility
In the last year, Zoom has introduced a number of new features and tools that increase the accessibility of the video conferencing platform! One major addition has been the introduction of live transcription. Live transcription options include automatic transcription (computer-generated) or manual transcription (human-generated). You can also connect a third-party captioning service to your Zoom meeting if you’re interested in using a professional transcriptionist.
Not sure which type of live transcription to pick your Zoom meeting or event? Check out our captioning decision table for guidance!
Besides the live transcription feature, Zoom has added other new functionalities that increase accessibility including adjustable chat text size, expanded keyboard navigation for all major workflows, and better screen reader settings. Zoom has a page on their website that highlights all of its accessibility features: https://zoom.us/accessibility.
We’d also strongly recommend checking out our new guide on Hosting Accessible Zoom Meetings! This guide has recommendations for what to do before, during, and after your remote Zoom meeting to make sure the meeting is accessible to your participants.
Just for Fun: Immersive View and Video Filters
Liven up your Zoom meetings with these fun features! Just last week, Zoom debuted Immersive View. With Immersive View, you can set up a virtual setting for your Zoom meetings such as a virtual classroom, a café, an auditorium, and an art gallery. If you don’t like the default options you can opt to upload your own image to use as a virtual setting. See Immersive View in action below:
If you want to use Immersive View in your meetings, you’ll want to first enable it in your Zoom settings. Log into your account at zoom.emerson.edu, then click Settings on the left. From there, underneath Meeting select In Meeting (Advanced). Scroll down until you see Immersive View and toggle it on to enable it.
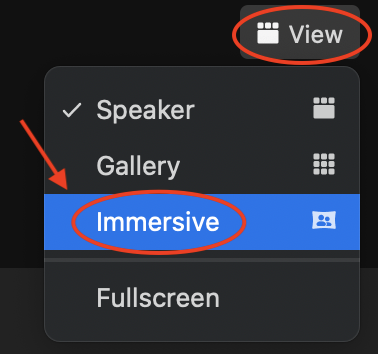
To use Immersive View in-meeting, click View at top right and select Immersive:
Then, choose the virtual setting you want to use and click Start. You can rearrange participants’ videos by dragging and dropping their video, similar to the same way you can change the video order when you’re not in Immersive View (see the “Customizing Video Order” section above). Note that when in Immersive View, your participants will always be following your video order, meaning if you make any adjustments to the arrangement of participants on your screen those changes will also be made on your participants’ screens.
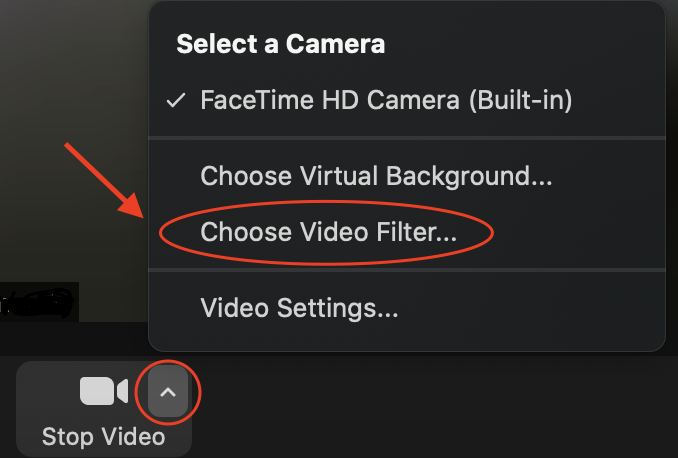
Keep the fun going with video filters. To use filters in-meeting, click the caret next to Stop/Start Video, then select Choose Video Filter…:
Choose from one of the several video filters available. When you’ve found the filter you like best, you can close out of the settings window and show off your fun filter!