In a Nutshell: How to Use the New Canvas Scheduler
Official guides for tools like Canvas and Panopto are dense out of necessity—the authors need to cover EVERYTHING about each topic. In this series, “In a Nutshell,” I’ll condense frequently requested instructions into practical, bite-sized chunks.
Learn a new tool in the time it takes to drink a cup of coffee!
How Do I Create Appointment Groups?
The nut we’re cracking today is the new Canvas scheduler (live as of this Fall). This tool creates groups of time slots your students can reserve, called appointment groups, on your course calendar. Here’s how.
1. Log in to Canvas. Click the Calendar button in your account menu. It’s the purple strip to the far left:
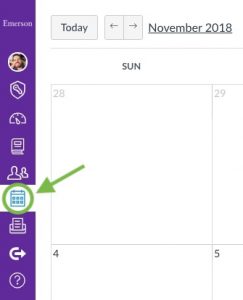
2. Click the day of the month on which you wish to create appointments. If you’re not already there, toggle to Month view using the switch at the calendar’s top right.
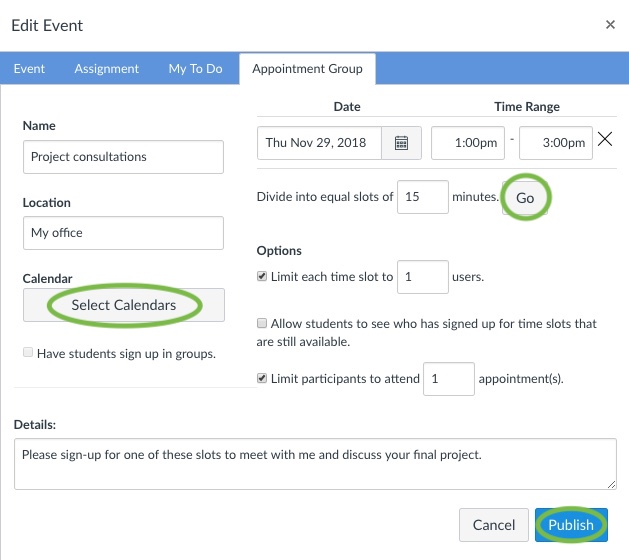
3. In the window that appears, click the Appointment Group tab. Fill out the form to create your appointments and (optionally) limit the number of participants. Note that you’re creating a group of appointments; name this group something that clearly reflects its nature, such as “Office Hours” or “Project Consultations.”
Be sure to click the Select Calendars button and check the box for your course’s calendar. Each course you’re teaching has its own calendar.
You can enter your desired appointment times manually, one-by-one: a new row will appear each time the previous row is completed. Or, you can enter the entire range of appointments (say, 1 pm to 3 pm) in the first row, enter the length of time each individual appointment should be, then click Go. Canvas will automatically divide up the appointments:
4. When you’re satisfied with your group of appointments, click Publish. Students can now find and reserve your appointments.
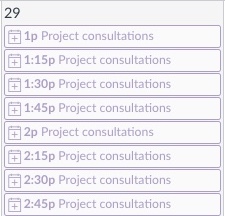
The appointment group will appear as a series of time slots on your calendar. They’ll be greyed-out because no one has reserved any yet:
When students reserve slots, they will appear bolder on your calendar. To view all your appointment slots at once and see who’s signed-up, click Agenda at the top right of the calendar:
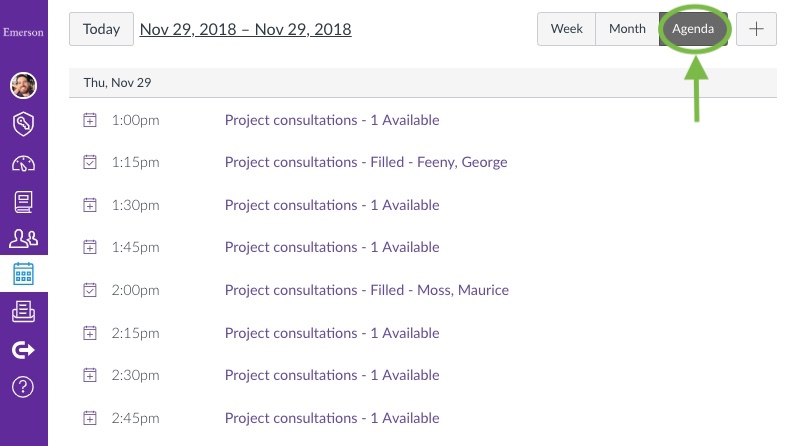
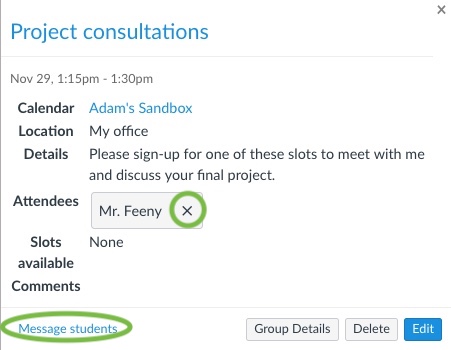
To remove a student from an appointment, or to message students who have reserved an appointment, click on the appointment in either Month or Agenda view. Click the X next to a name to remove it, or click Message students to communicate:
To edit an appointment group’s settings, click on any appointment in the group, then click Group Details. You’ll be taken to a form with the same options as when you created the group.
How Do Students Reserve Appointments?
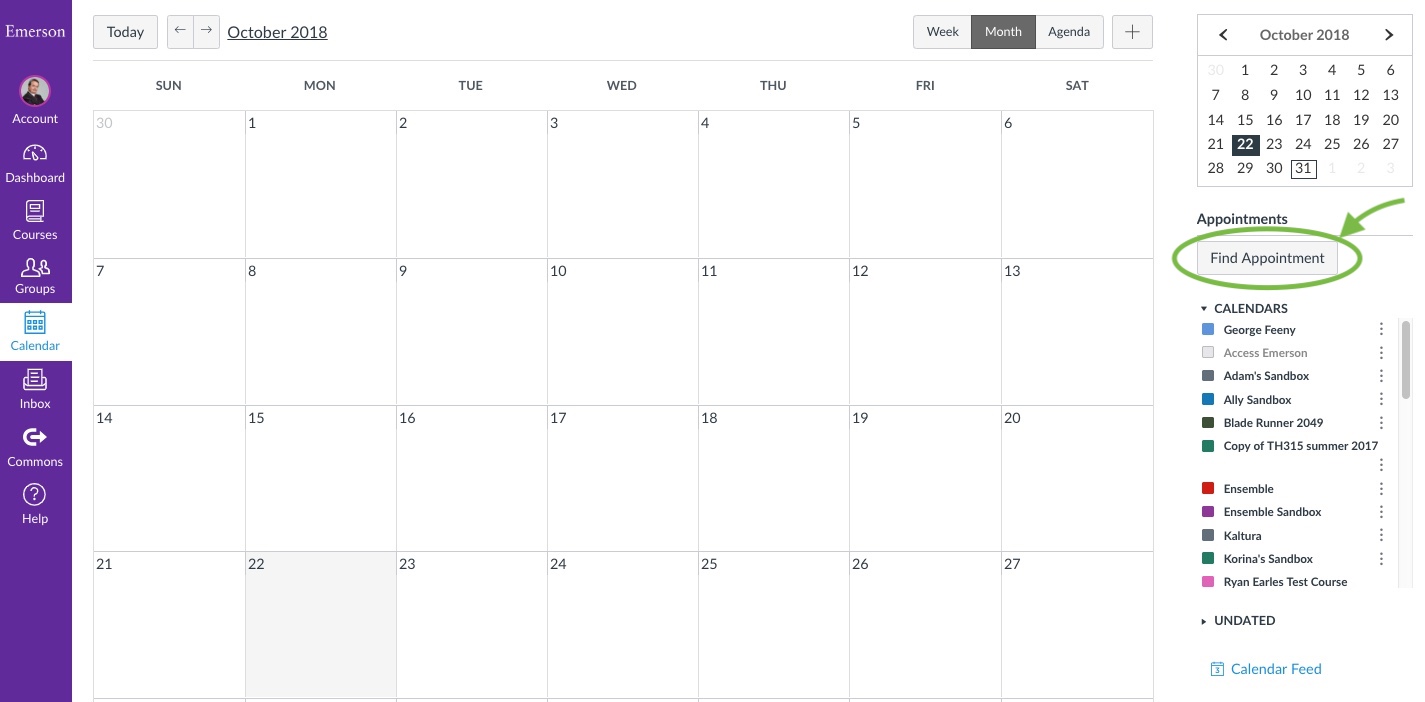
Students can find your appointment slots by going to the calendar in Canvas, then clicking the Find Appointment button on the right. Here’s where students will see that:
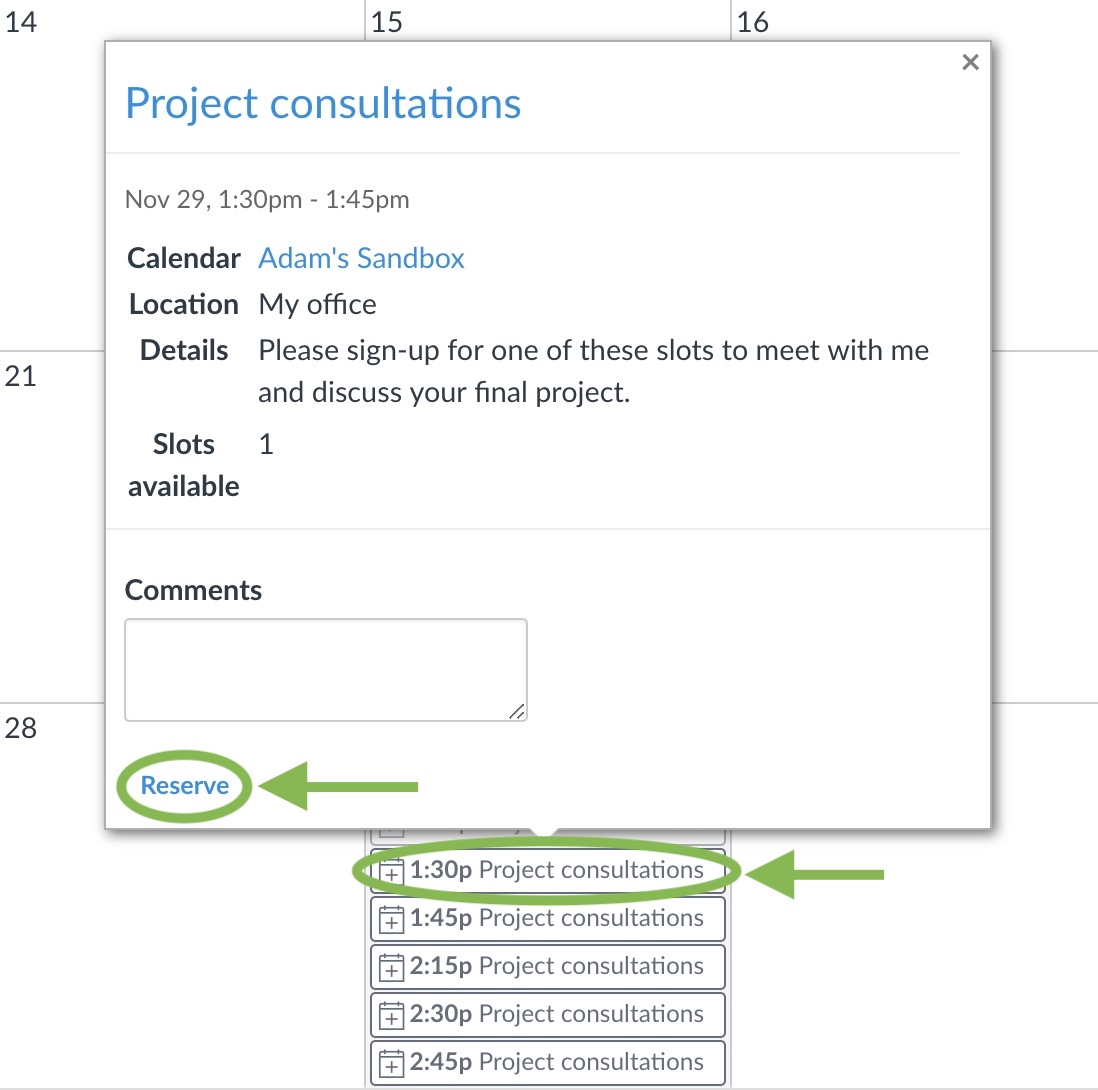
They’ll be prompted to choose a course’s calendar. When they choose your course and click Submit, the appointments you’ve created will be revealed.
The student can click on an appointment to view its details, then click Reserve to book it:
That’s it!
You can find the full (exhaustive) documentation here:
Add an appointment group
View and edit an appointment group
Remove students from an appointment
And as always, please reach out to ITG@emerson.edu if you run into trouble, or if you’d like to suggest a topic for this series.