
Advanced Google Docs Tips and Tricks to Make Your Life Easier
Google Docs is so commonly used these days that the time before collaborative document editing can seem like a distant memory. But I remember when a group project entailed a series of increasingly passive-aggressive emails with attached documents titled things like the following:
- Real_Final_Draft.doc
- Real_Final_Draft_edit.doc
- Last_Call_For_Revisions_Final_Draft.doc
- Final_Draft_NO_MORE_CHANGES_THIS_IS_DUE_TOMORROW_AT_8AM.doc
Google Docs looks pretty straightforward if you’re used to word processors. If you need some help with the basics, Google has some great resources for that! For this blog post, however, I have some lesser-known and more advanced tips and tricks for making Google Docs even more useful.
Using ISO 8601 Formatted Dates as Prefixes for Your Document File Names
This isn’t a trick specific to Google Docs, but it can help make your life easier. I talked about it so much at my last job that it became something of a running joke. How we managed to make a joke out of something as dry as a file naming convention, I’ll never know, but I digress.
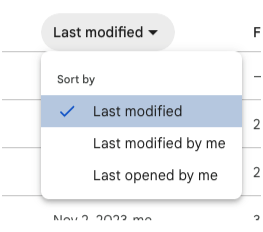
The ISO 8601 date format is yyyy-mm-dd. There are two advantages to this. First, it helps avoid ambiguity, since dates can be written mm-dd or dd-mm. Second – and this is the game changer – is that when you start a file name with a date in the ISO 8601 format, your files will be sorted automatically newest to oldest (or oldest to newest) based only on the file name. Date-based sorting order options for files in Google Docs are Last modified, Last modified by me, and Last opened by me:
While these are useful, many of us need to see the history of our work in chronological order. By starting your files names with an ISO 8601 format date, you can see that, and it also helps if you are working on multiple versions of a document. That way, you can have documents with titles like the following:
- 2023-11-13_Report
- 2023-11-20_Report
- 2023-11-27_Report
These are more useful than ambiguous titles like these:
- Draft_Report
- Revised_Draft_Report
- Final_Report
Pageless Formatting
Is your thought process just too expansive to fit within the confines of 8.5 x 11? Would you rather do your thinking on poster paper on a wall? Do you have an especially wide table that you want to be able to see as much of as possible without scrolling? Try pageless formatting! This is a setting that you can apply to a document – even after you’ve started it – that sets up your document so that it “scrolls continuously.”
Sidenote/Fun Fact That Actually Leads to a Relevant Consideration (I promise!): You could argue that the convention of a digital document being presented on a screen with a digital representation of a piece of paper is an example of a skeuomorph. Today the term “skeuomorph” is used to describe a design feature in something that exists on a screen that persists from an earlier, non-digital form of that item. The visual similarities persist, even though those elements are not functionally necessary like they were in the original form. However, if you are working on a document that you intend to print, working with digital pages can be helpful!
So, pageless formatting may not be the best option if you want to print your document eventually. However pageless formatting unlocks another very useful feature in Google Docs…
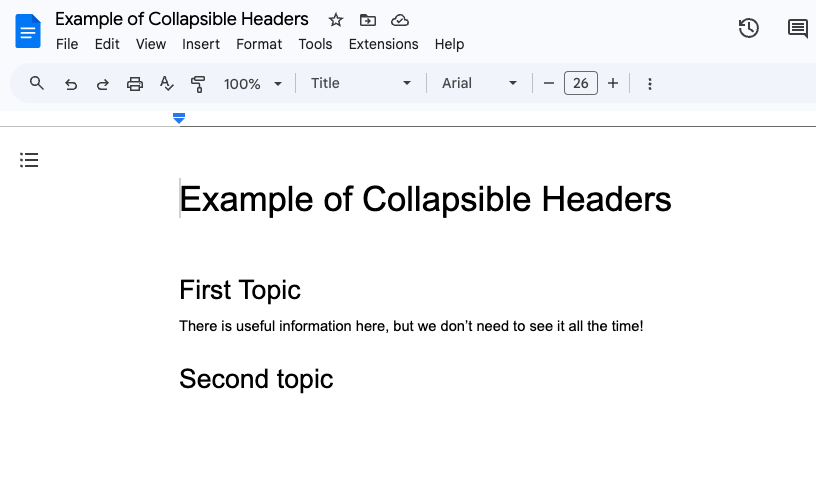
Collapsible Content
Collapsible content is a relatively new feature in Google Docs that is excellent for long planning documents, or if you just like to keep your document visually uncluttered. It’s only available for pageless formatting, though, and you need to use headings. (Sidenote: A heading isn’t just larger text! If you’d like more information about headers, check out this short video in one of our recent blog posts.)
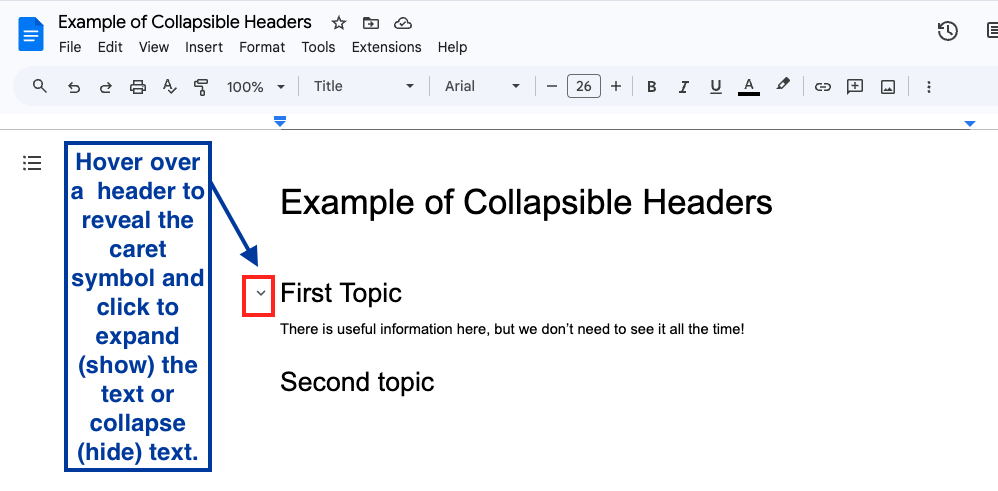
When you hover over a header, you will see a caret (⌄) symbol. That means that the content underneath that header is expanded. You can click the caret again to hide the content underneath the header:
Using collapsible headers will turn on the document outline view on the side, as well. This is a great tool for long documents, since it acts as a table of contents!
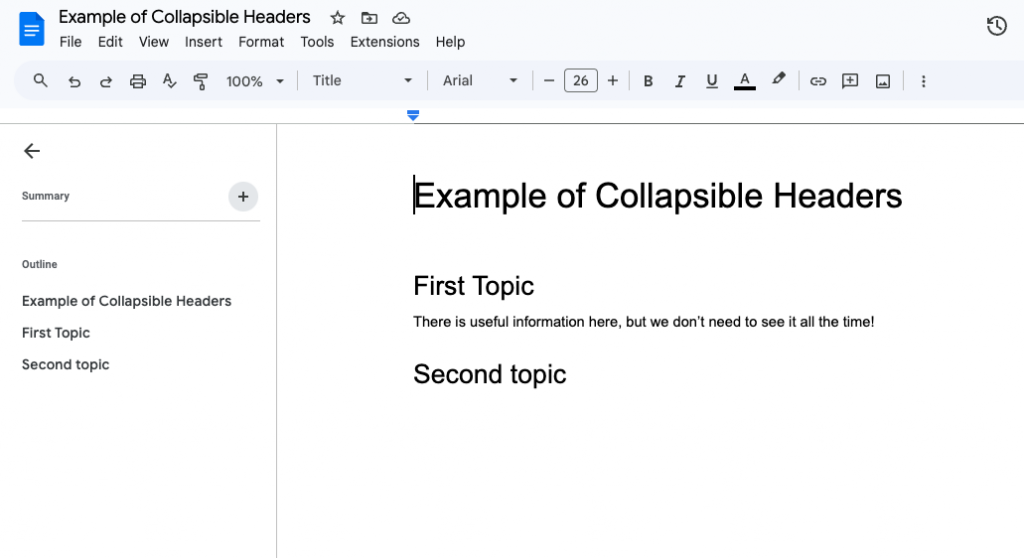
You can hide the document outline view on the side by clicking the ← arrow. If you want to see it again, click the list icon.
