How to Embed Videos in Omeka Items
Are you a librarian, archivist, or scholar interested in creating your own digital collection? Omeka, one of the tools you can install on your Emerson.build domain, might be for you! Omeka is a content management system similar in some ways to WordPress or Drupal, but unique in its focus on curation and archival metadata. It’s great for creating digital exhibits that showcase scholarship—both texts and media—in interactive, detailed, and highly organized ways.
An “item” is Omeka’s most basic building block; think of it as a bucket containing all the data and metadata about an artifact or topic. Because Omeka offers about a million different fields to complete when creating an item (most of them optional), it’s easy to miss some of the more dynamic options. One such hidden gem is the ability to embed video into your item. Here’s how!
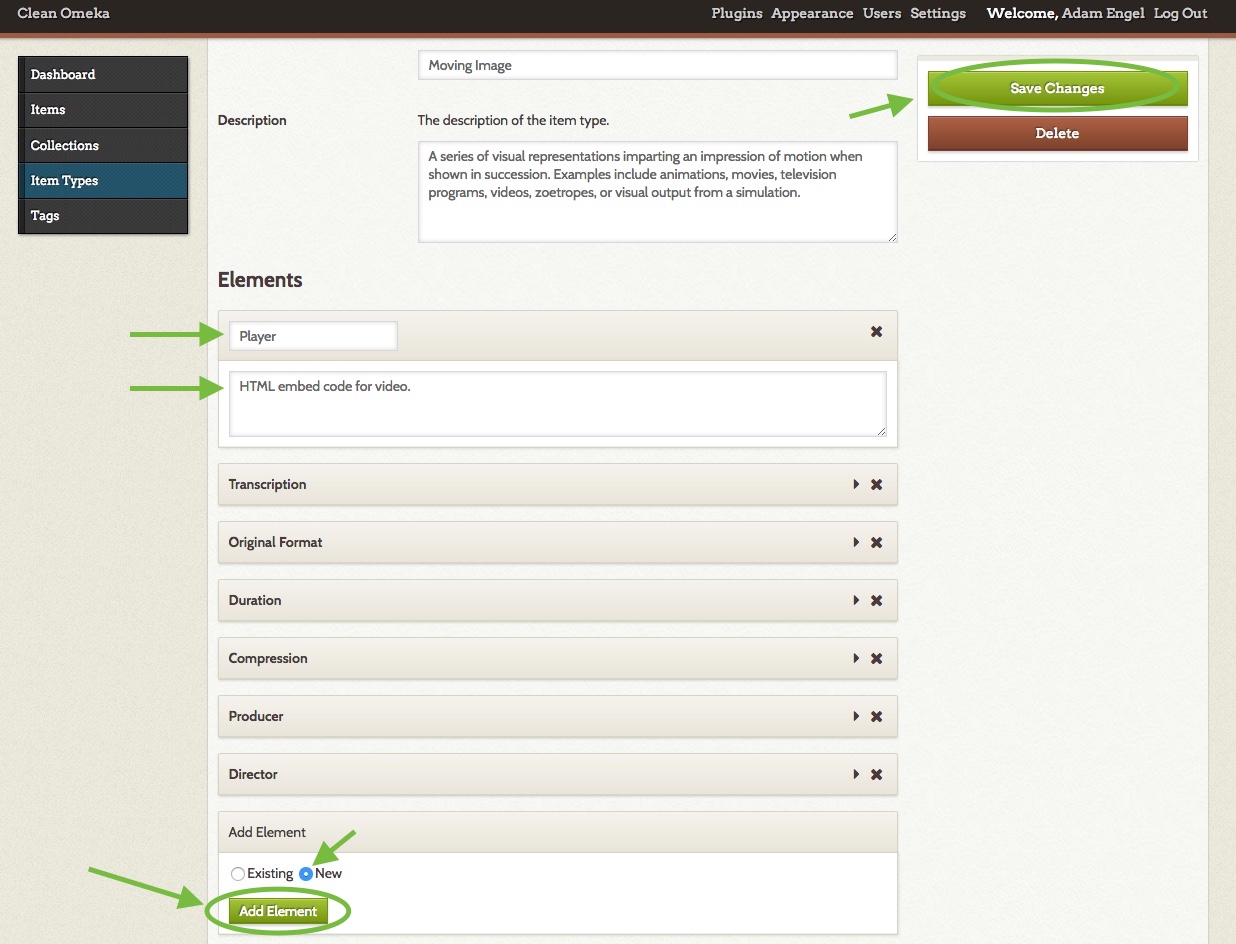
- Go to your Omeka dashboard (your Omeka URL ending with /admin). Click Item Types on the left-hand menu. Under Moving Images, click Edit.
- At the bottom of the form: select the button next to New, then click the green Add Element button. Enter “Player” for the title and (optionally) a sensible description. Then, you can drag this new element to the top of the list so it’s easy to find when you’re making items.
- Begin creating an Item. Click the Item Type Metadata tab. Select Moving Image as the item type. This will cause more fields to appear below. In Player (now the first field): first, check the Use HTML box, then click the HTML button that appears in the top right corner:
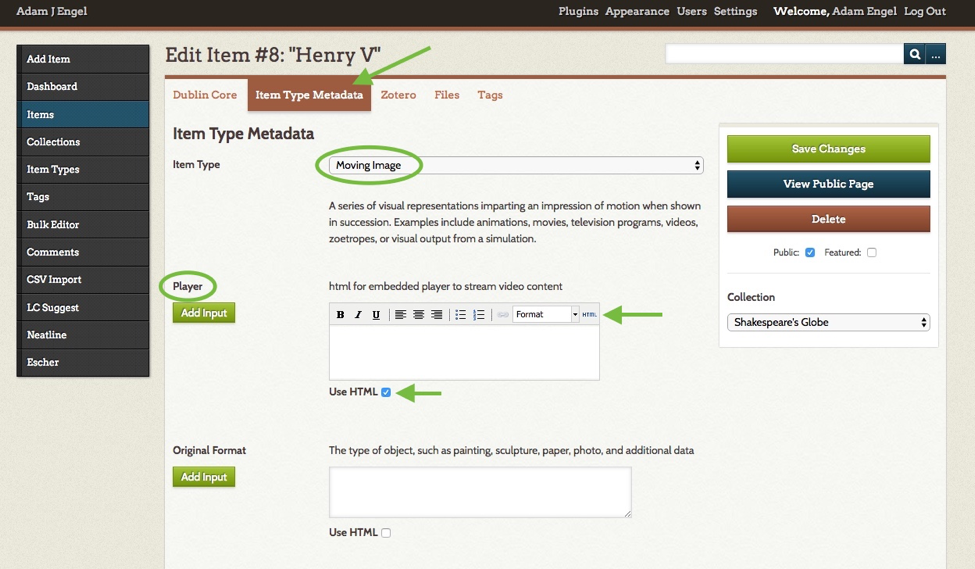
- A pop-up window will appear called “HTML Source Editor.” Paste your video’s iFrame embed code (or whatever other kinds of embed code) here, and click Update. The embed code will look something like this, but with your video’s URL (typically from Youtube, Vimeo, or a similar service):
<iframe width=”480″ height=”360″ src=”//www.youtube.com/embed/sJZTlrQZMjY” frameborder=”0″ allowfullscreen=””></iframe>
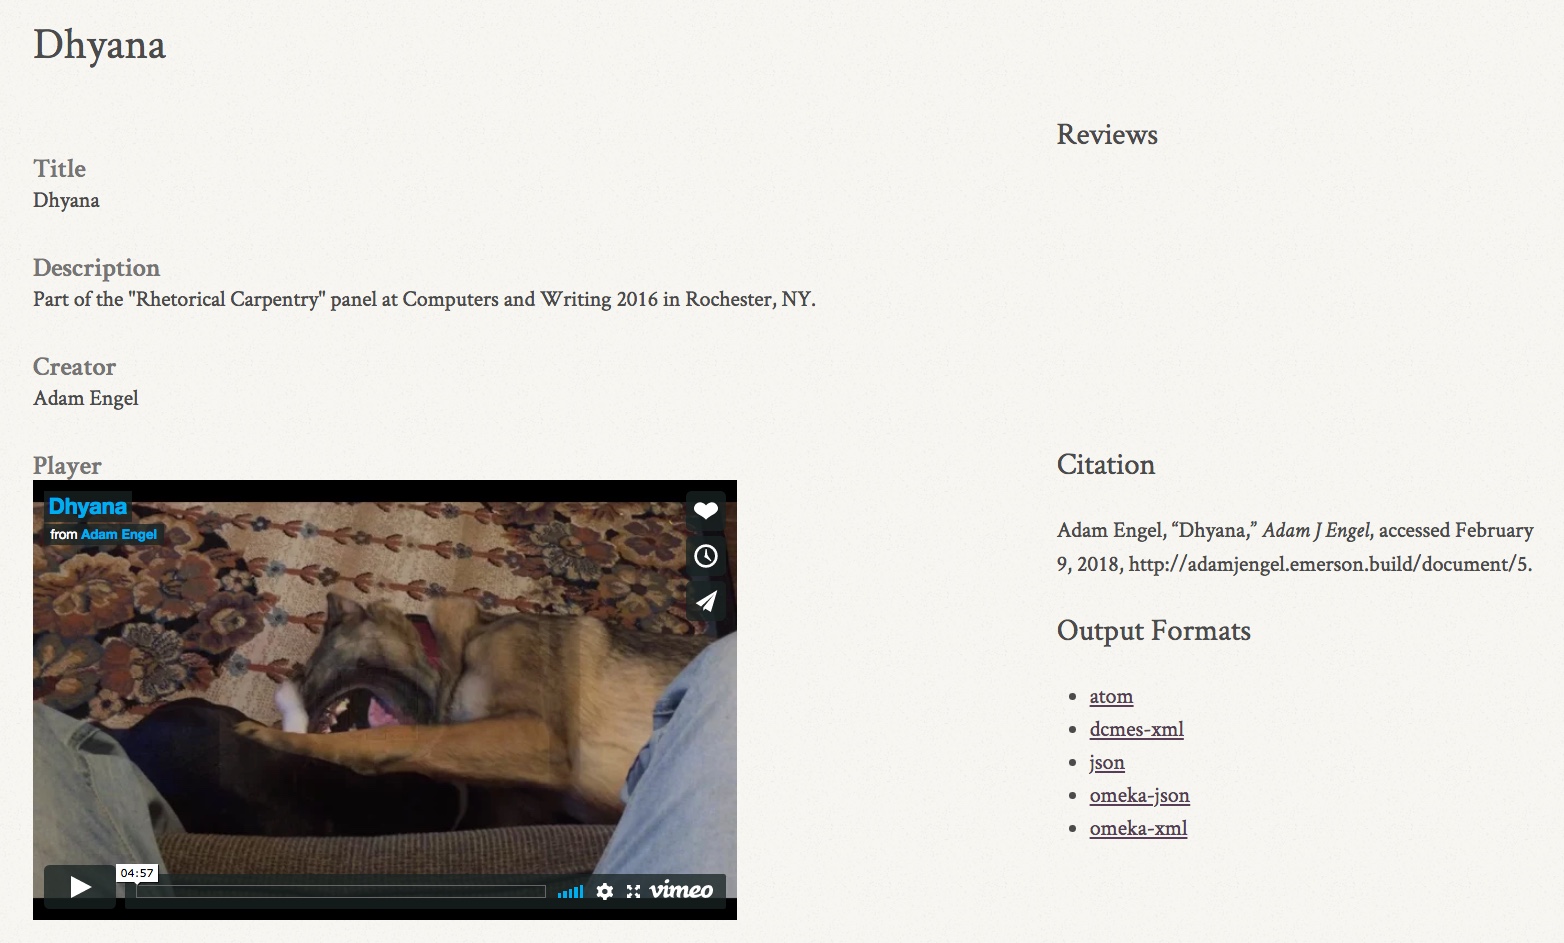
- A yellow box appears in the Player field. Click Save Changes, and you’re done! Your video should display on the Item’s public page:
If you’re working with Neatline exhibits—interactive maps or timelines—you can import your item into Neatline, and the resulting record will contain your video!
If you’re interested in using Omeka and/or Neatline, I recommend checking out the following resources (in order):
- See some inspiring demos of Neatline in Omeka.
- Learn how to use Emerson.build.
- Learn how to use Omeka.
- Learn how to use Neatline.
As always, you can contact ITG@emerson.edu for hands-on tutorials!