Spruce Up Your Course with HTML in Canvas

Have you ever stumbled upon the HTML editor in the Canvas Rich Content Editor and wondered what it was? HTML stands for HyperText Markup Language and is used to make webpages. Using HTML in Canvas allows you to organize your content and customize the look of your course. Read on for some HTML ideas you can easily incorporate into your course!
How do I access the HTML Editor in Canvas?
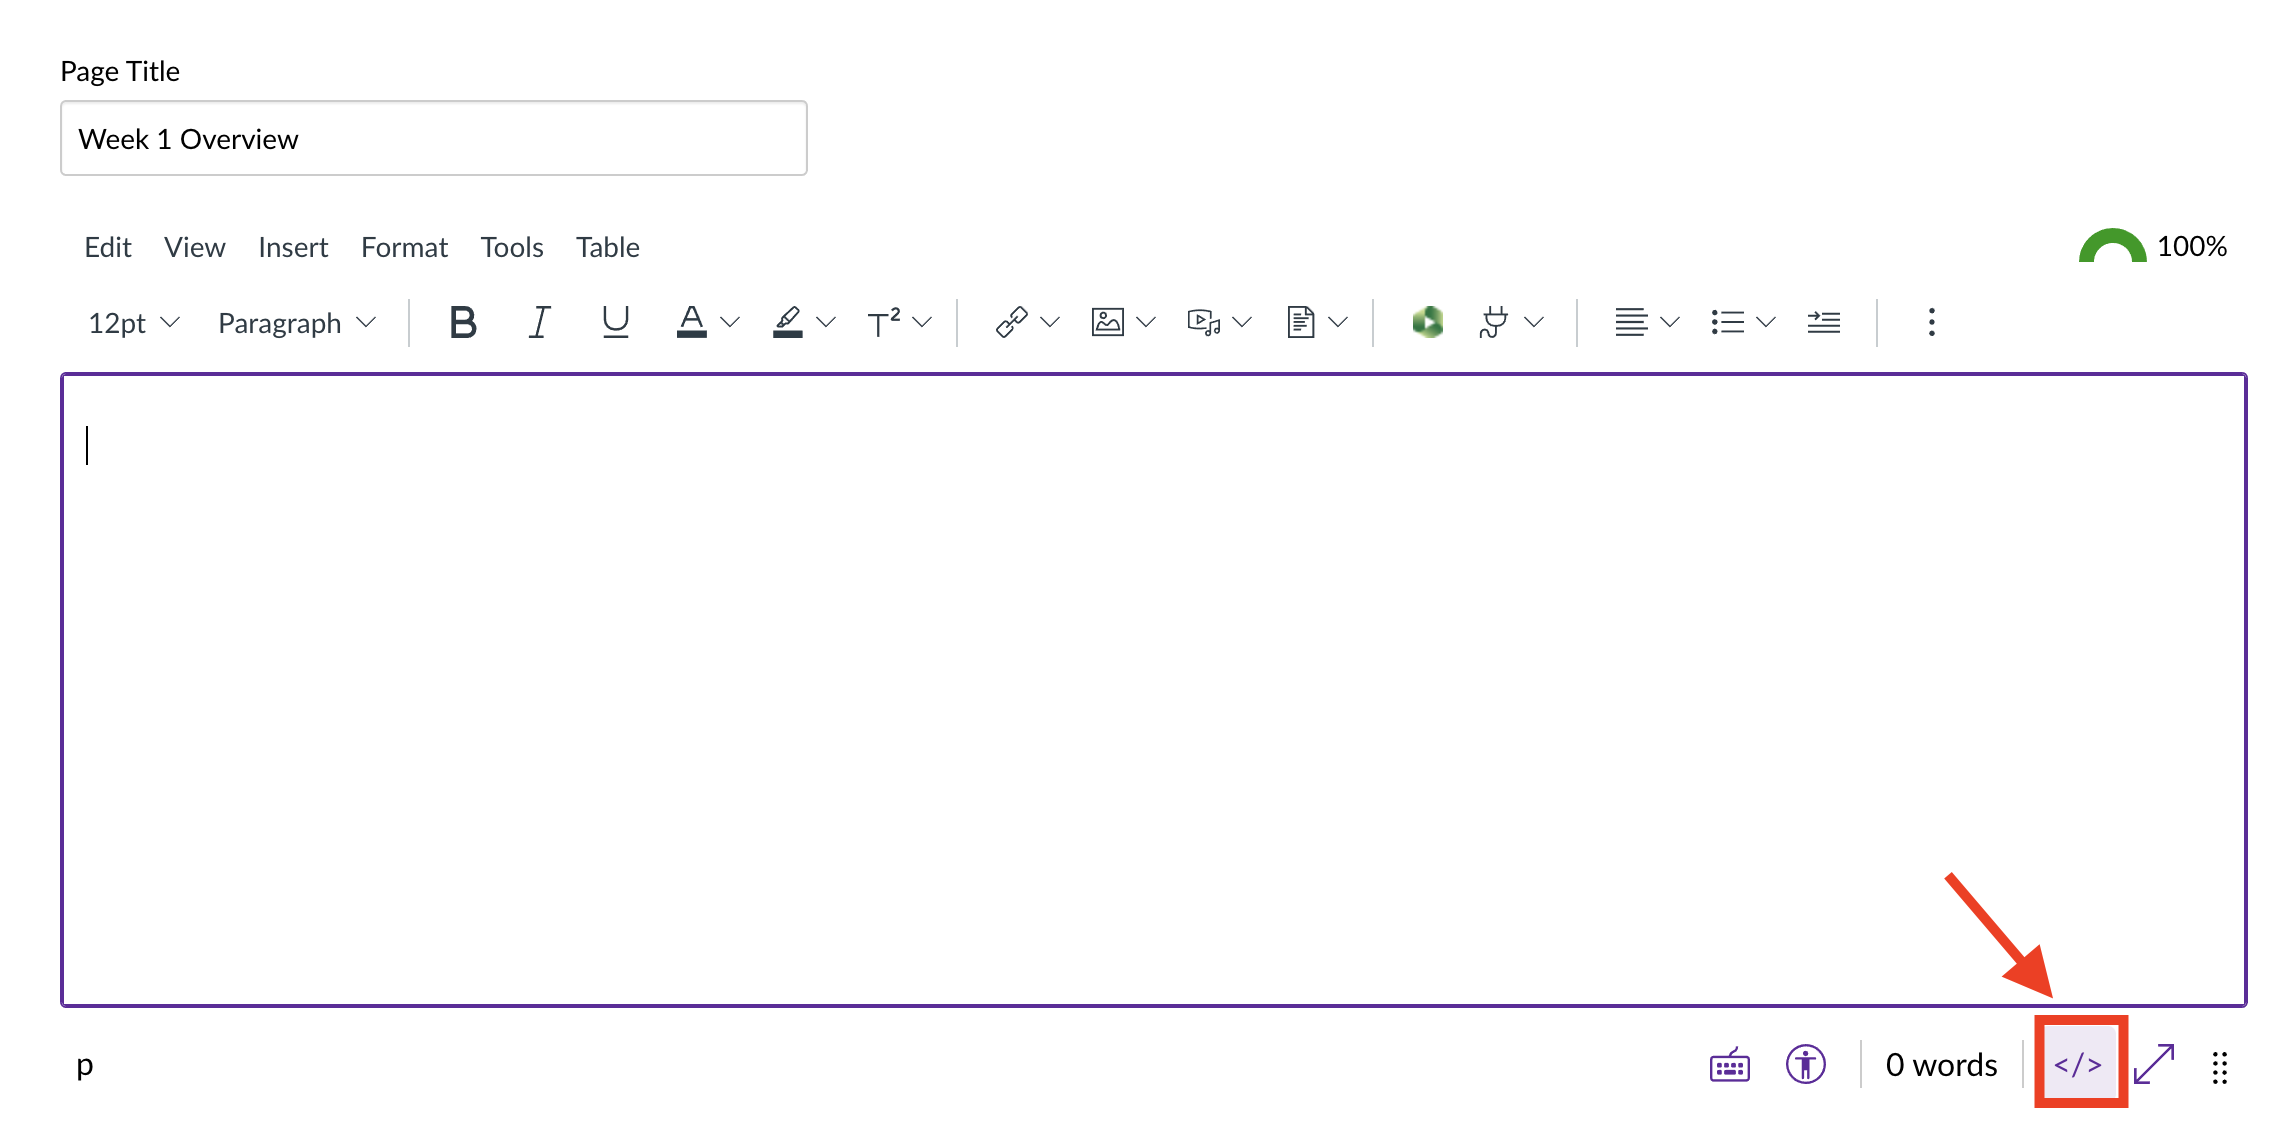
To get started, find the Canvas item that you want to edit the HTML of, then click Edit on the item to get into its text editor. At the bottom right of the text editor, click the HTML editor button (</>):
Click the same button to switch back to the regular text editor.
HTML ideas and inspiration
Wrap text around images
If you like to embed images in your Canvas pages (or assignments, discussion boards, etc.), try out this technique to wrap text around your images for a new look. First, upload and embed your image, give the image alt text, and add accompanying text as you normally would. You can also resize the image from its default size if you wish.
Next, switch to the HTML editor. You should see your image designated by the ‘img src’ HTML attribute. Between ‘img’ and ‘src’ add the following:
style="padding: 0 15px; float: left;".
You can change the “float” value from left to right depending on if you want the image to appear wrapped in text on the left or right side of the page.
See this Canvas Community blog post by Stef for more information and a screenshot of what your page will look like after using this code.
Split content into columns
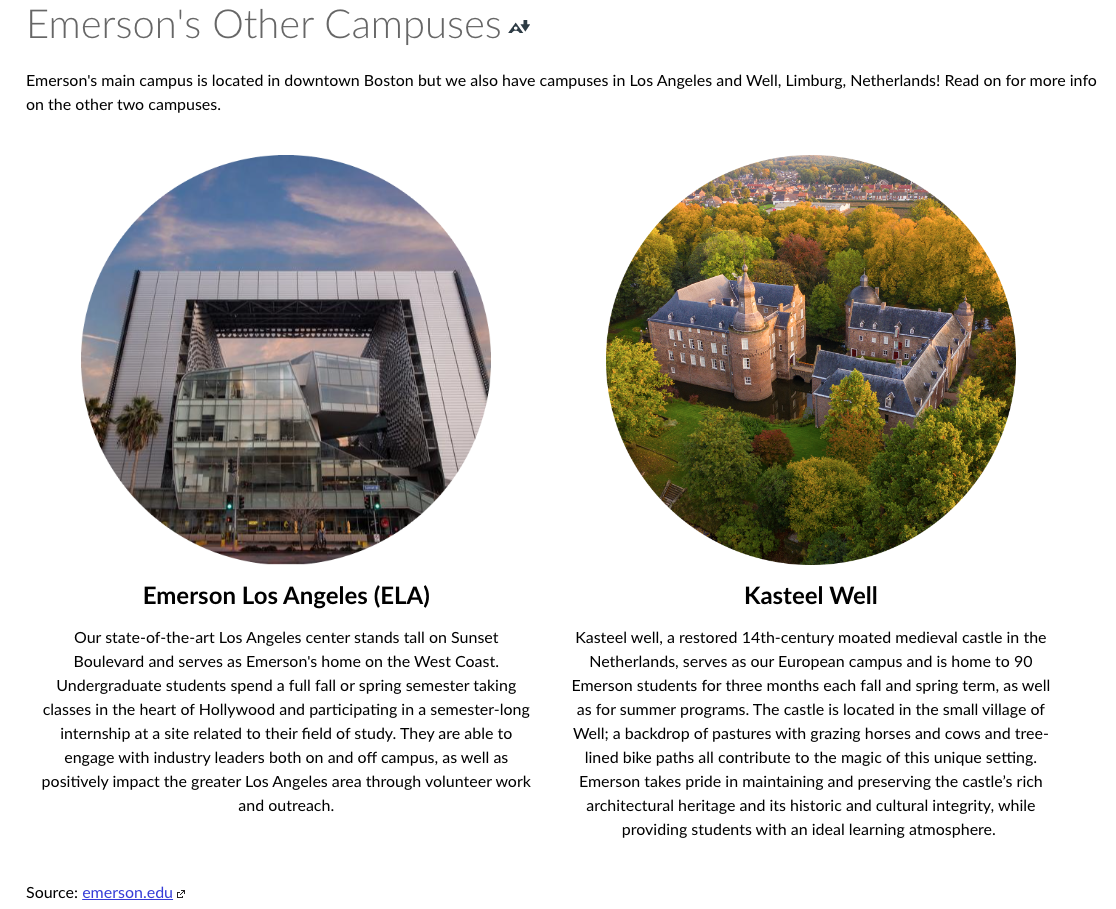
Instead of the standard layout of Canvas pages, you can split your content into columns as in the screenshot below:
You might think that inserting a table in Canvas with invisible borders and populating it with your content is a good way to get a similar look as above, but it’s always better to use HTML rather than the built-in table maker—tables must be formatted in a specific way in order for them to be accessible, and using tables merely to control the layout of your content would result in a poorly-formatted and digitally inaccessible table. Instead, use HTML: first edit the page and add your content using the text editor as you normally would. Then, switch to the HTML editor and place this code around the content you added for each column of content:
<div style="width: 45%; display: inline-block; vertical-align: top; padding: 15px;">
[The HTML of one of the column's content you already added]
</div>
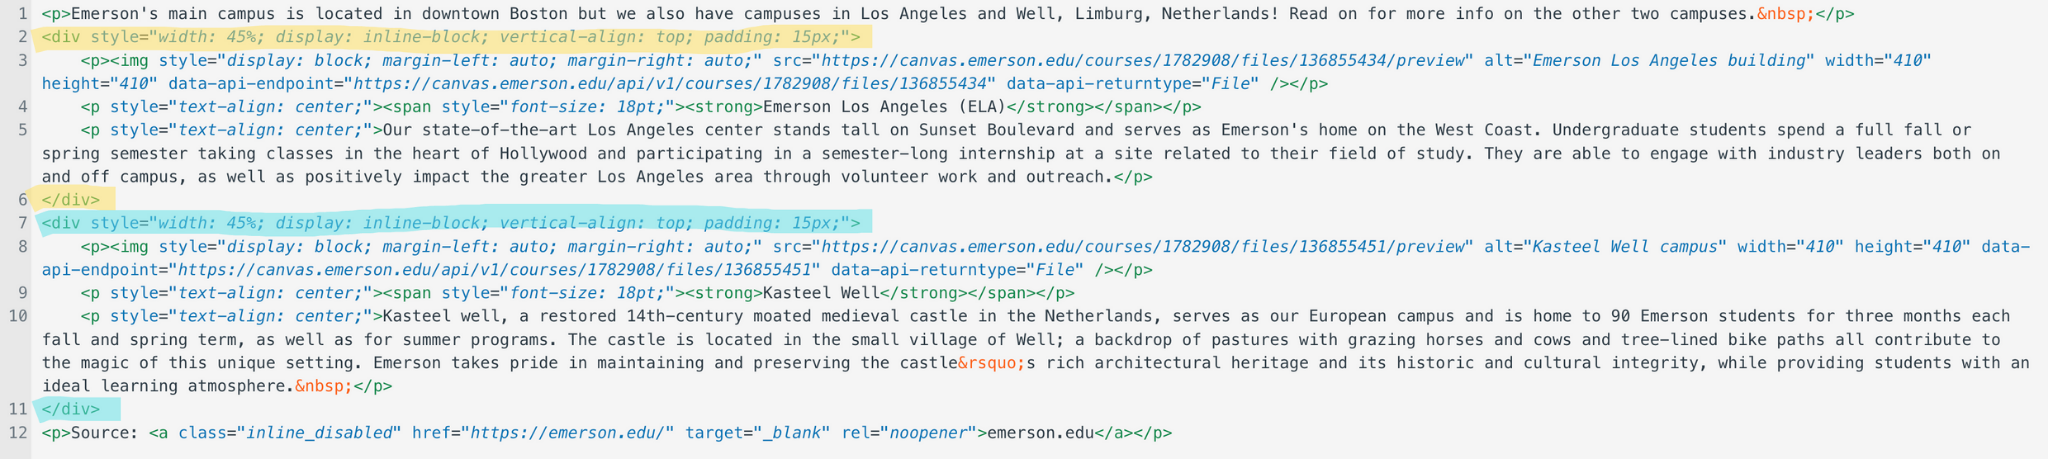
Below is a screenshot of what the code looks like in my HTML Editor, with the code that creates the columns highlighted (the yellow highlights indicate the code that creates the first column while the blue highlights indicate the code that creates the second column). Click the image to enlarge:
To split into 3 columns, you should set the width to around 30% and adjust the padding value as well—you may need to experiment with these and try out a few different combinations of values to achieve the look you’re aiming for. For a more detailed explanation of this code snippet, see birger_eriksson’s post on the Canvas Community.
Adjust the size of an embedded Panopto video
You’ve probably noticed that in the process of embedding a Panopto video, before inserting it into your Canvas page, you have the option of adjusting its size first. If you wanted to resize the video after you’ve already embedded it, instead of re-doing the embed to resize, it would be easier to resize via the HTML editor.
All you need to do is change the values for ‘width’ and ‘height’ that you see in the video’s embed code (look for iframe class=”lti-embed”—all embedded Panopto videos start with this code). The default values are 720px (pixels) for width and 405px for height. Experiment with adjusting the pixel values in the HTML editor and see what values work best for you.
Place content into a callout box
You can use callout boxes to highlight important information:
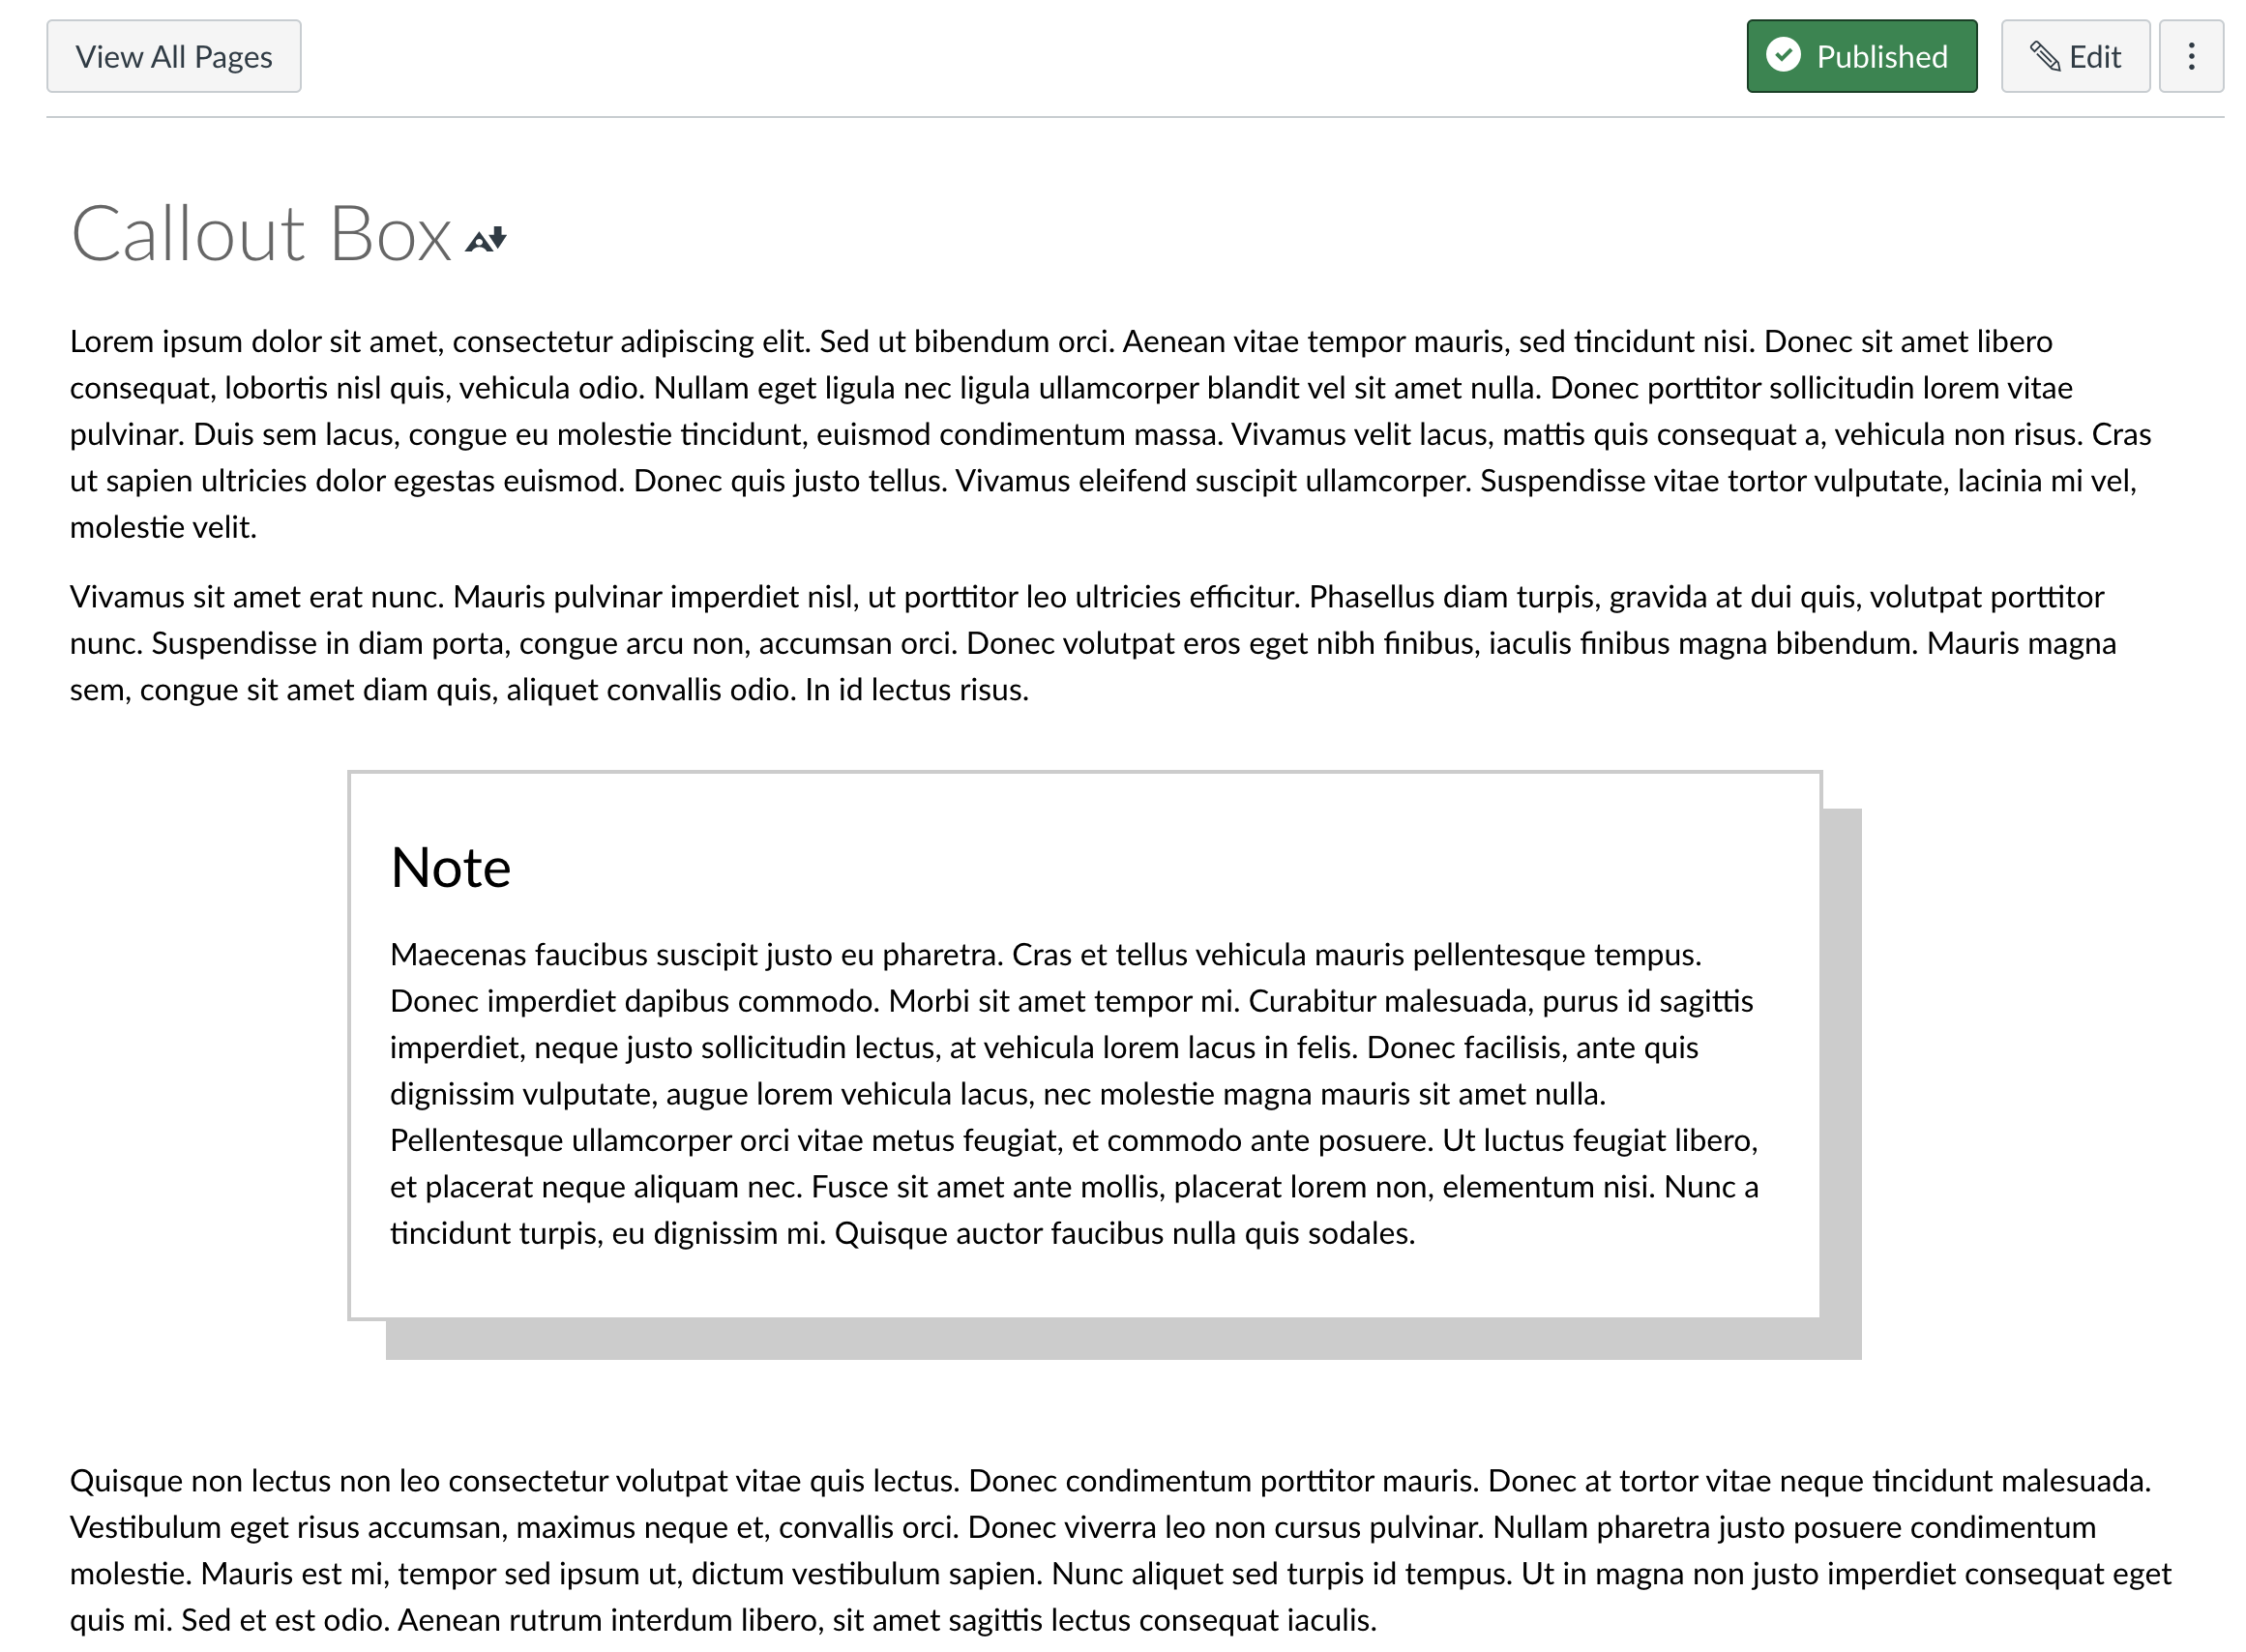
To create a callout box, first add all of your content in the order you’d like them to appear in the Canvas text editor. Then, switch to the HTML editor. Find the code corresponding to the content you’d like to place into a callout box. Add the relevant code for the callout box around the code of this content, as in the example below:
<div style="margin: 50px 15% 50px 15%; background-color: #ccc;">
<div style="position: relative; top: -20px; left: -20px; padding: 20px; background: #fff; border: 2px solid #ccc;">
[The HTML of the content you want placed inside the callout box]
</div>
</div>
When you switch back to the regular text editor you should now see a callout box with the content you isolated. You can add images, headers, and embedded Panopto videos within a callout box.
Looking for more ideas or code snippets?
Canvas Community, a forum where Canvas users can share ideas and information with each other, is a great place to browse for all your HTML inspo needs. If you have something specific in mind already and need to find out if it’s possible to achieve in Canvas (and if so, how), try searching for it to see if anyone has discussed your idea previously. If you’re looking for new ideas, try browsing the Instructional Designer blog (specifically the HTML and code snippet tags).
When you’re browsing the Community, keep in mind that some posts are on the older side and may contain outdated information or code snippets that are no longer valid.
Limitations
Please note that not all code, especially complex code, is accepted by the HTML editor in Canvas. You may find that you’re adding valid code that should be reflected on the page you’re editing, but after saving your work you can see that the intended change wasn’t picked up. If you check the editor you’ll see that what you had entered has been removed from the HTML editor. This is an indication that what you’re trying to do is not possible. For this reason we recommend sticking to the Canvas Community resources mentioned above when trying to look for HTML that will work in Canvas.
Additionally, any HTML you use in your Canvas courses should be digitally accessible and functional on mobile devices. You can use the Ally accessibility checker within the Canvas RCE to determine whether your HTML is digitally accessible, but free to reach out to us if you have any accessibility-related questions. To ensure mobile functionality, we recommend checking that your content is appearing properly within the Canvas Teacher app.
Need more help?
Feel free to reach out to us at itg@emerson.edu or 617-824-8090 if you have any questions about using HTML in your Canvas course! We are not able to guarantee custom HTML solutions for every request, but we can provide best-effort to help you get started and troubleshoot HTML in Canvas.
Photo by Jackson Sophat on Unsplash